Build A Glass Anaerobic Fermentation Vessel
March 6, 2013
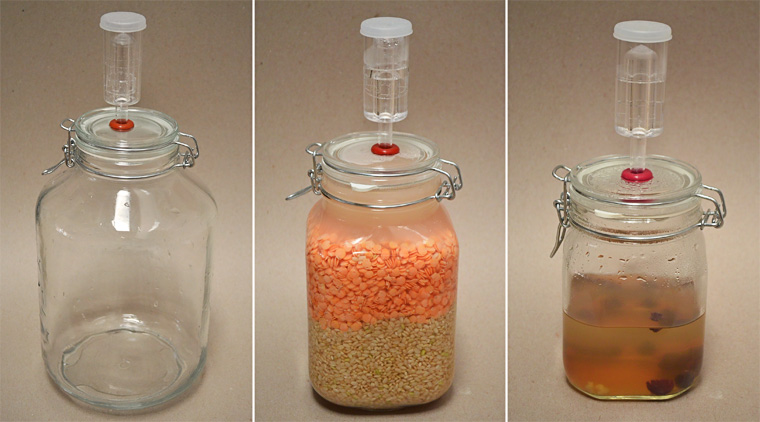
from left to right: empty 5-liter vessel, 2-liter vessel with unground idli batter, 1-liter vessel with water kefir
Building an all glass, anaerobic lacto-fermentation vessel is extremely easy. All it takes is the creation of single 5/8″ hole, an objective simply accomplished with a hand drill. If (for some reason) you have access to a drill press, this already rudimentary project is made even easier!
REQUISITE TOOLS
1) 5/8″ diamond grit drill bit
2) electric hand drill
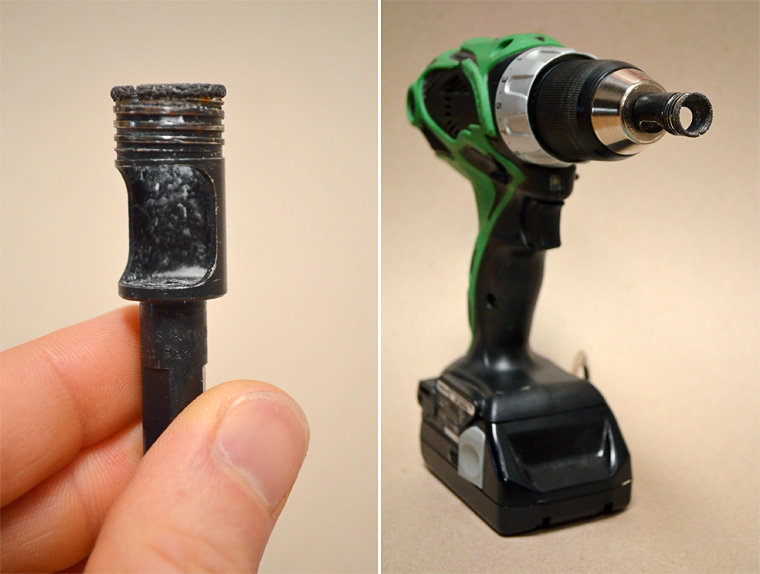
from left to right: 5/8″ diamond grit drill bit, diamond bit installed in cordless electric drill
Diamond grit drill bits are common pieces of tooling and run about $20. Or instead of buying the bit, check it out for free at your local tool lending library. They totally have drills too! If your local library system lacks a tool lending library, help start one (contact the Oakland Tool Lending Library for tips on this process).
FERMENTATION VESSEL PARTS
1) bail-top/French Kilner/wire bail/lightning jar (I use Fido brand)
2) airlock (comes in one-piece and three-piece variants, either will work)
3) size 2 rubber stopper with hole OR grommet with the following dimensions: inside diameter 3/8″, outside diameter 7/8″, overall thickness 3/8″, panel thickness 1/8″, panel hole diameter 5/8″ (I use mil-spec silicon grommets from McMaster-Carr part number 1061T27)
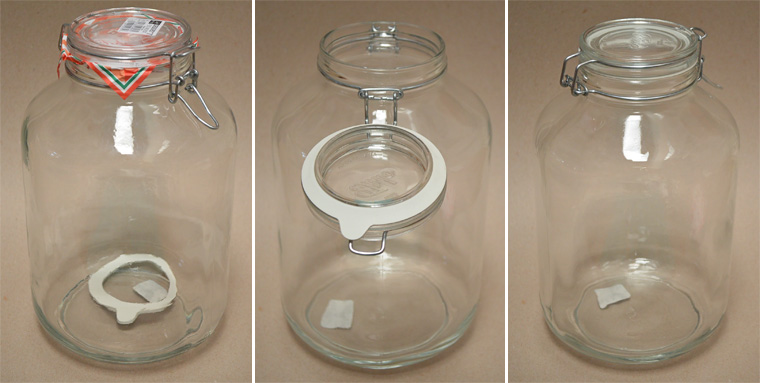
from left to right: 5-liter Fido jar as purchased, jar with rubber gasket installed, jar closed
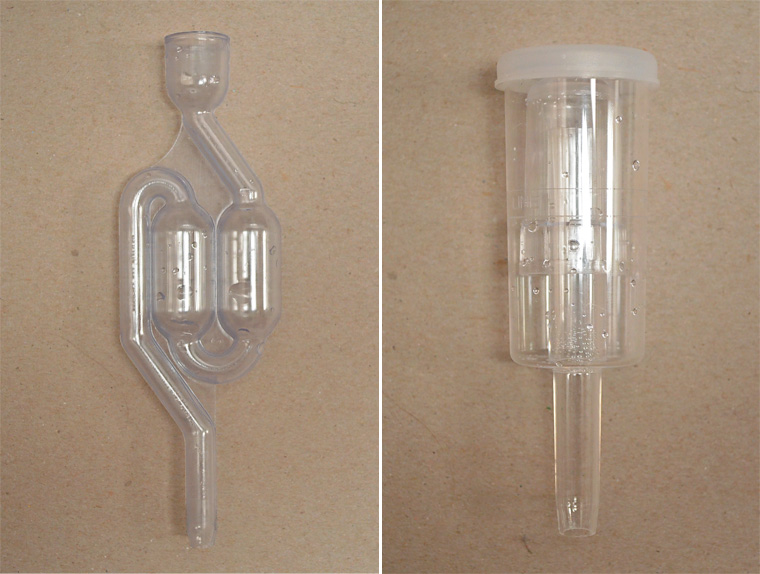
from left to right: one-piece airlock, three-piece airlock
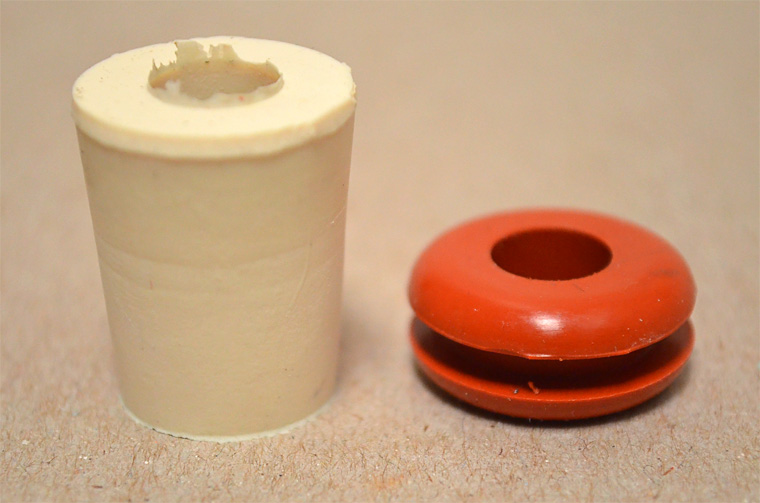
from left to right: size 2 rubber stopper with hole, silicon grommet (McMaster-Carr part number 1061T27)
Sur La Table is a source for Fido jars. I've also come across glass bail-top jars at Marshalls (side note: Marshalls' food section is fascinating). Airlocks and size 2 rubber stoppers are easily purchased IRL and/or virtually through homebrew supply stores.
PROCESS
1) drill a hole into the jar's lid using the 5/8″ diamond grit drill bit (center it if you want!)
2) push either the size 2 rubber stopper OR silicon grommet into/through the hole
3) push airlock into stopper or grommet
4) FERMENT!
To reiterate, drilling through glass is an easy process IF two simple rules are followed: GO SLOW and KEEP THE CUTTING END OF THE BIT WET WITH WATER. Diamond grit drill bits work by abrading (as opposed to cutting) the glass which is a slow process. The lids on the jars I use are only 1/8″ thick but I spend 90 to 120 seconds drilling out the hole.
This process also generates copious amounts of heat which we want to dissipate. Pouring a constant stream of water onto the grinding bit keeps the glass cool and results in a clean hole.
STEP 1: DRILLING SET-UP
- Place the lidded jar into some sort of tub. All the water you'll soon be pouring onto the bit will collect in the tub instead of spilling onto the ground. Alternatively, place just the lid into the tub. I prefer to work with an entire jar because the base provides a superb grabbing/stabilization point.
- Brace the bottom of the drill against a solid, vertical surface (I use a table leg). By drilling with a "backstop" like this, the drill's horizontal drift is drastically reduced. The goal is to maintain a 90° angle between drill and lid during the entire drilling process.
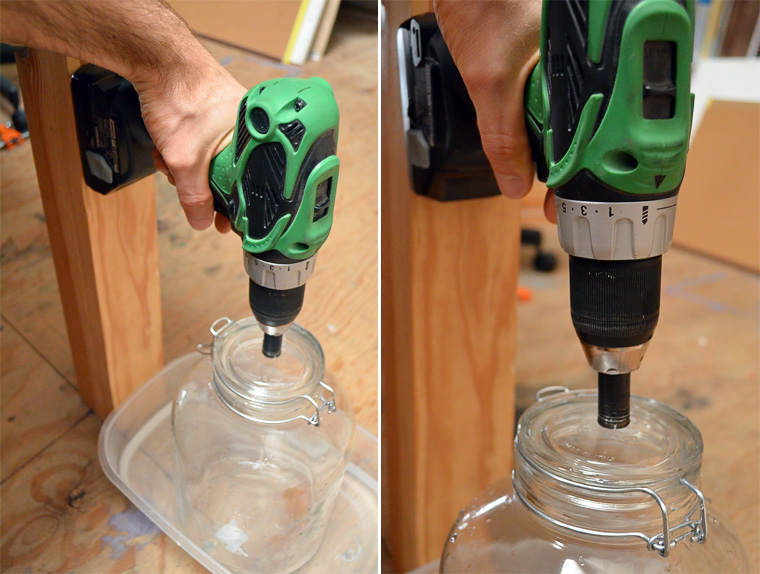
from left to right: jar in tub and drill braced against table leg, 90° angle between drill and lid
STEP 2: DRILLING
- Right before drilling, begin pouring water over the bit (or even better, get a friend to pour!). By utilizing a malleable plastic container for the pouring, one can easily aim the stream directly onto the bit.
- Go slow. And don't push down. Let the bit do the work. Remember, the diamonds in the bit are essentially sanding away the glass. Sanding takes time.
- The feeling of the drill will change in the moments before the bit fully cuts through the glass. At this important juncture, resist the urge to push down on the drill in an effort to "finish the job". If you do, there's a good change glass will chip out. But if this happens, IT'S OKAY. In fact, it really doesn't matter at all if the bottom chips out.
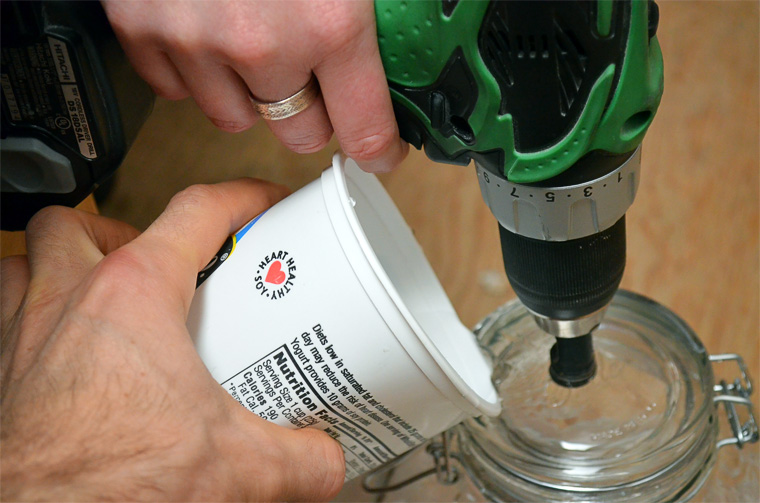
above: it's called teamwork
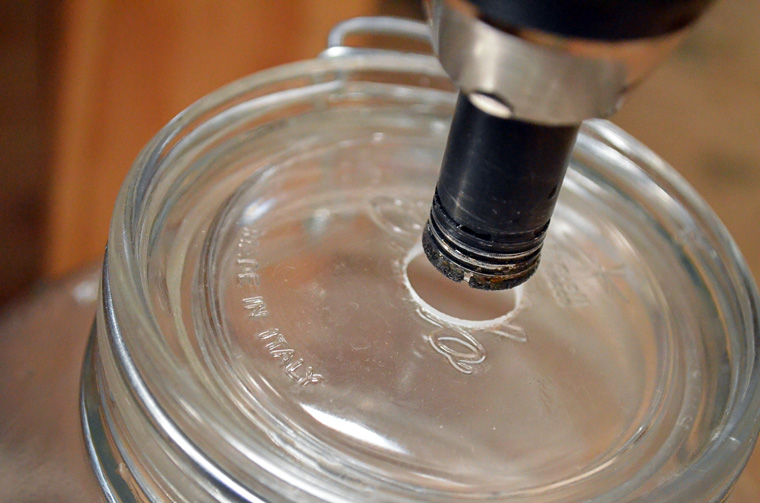
above: drilling accomplished
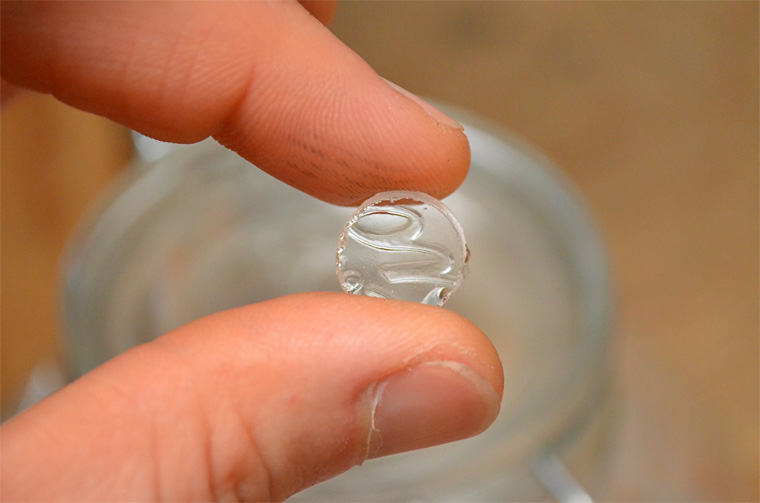
above: glass button
STEP 3: INSERT STOPPER OR GROMMET
- You kind of just jam them into the hole in the lid. The grommet takes a little folding.
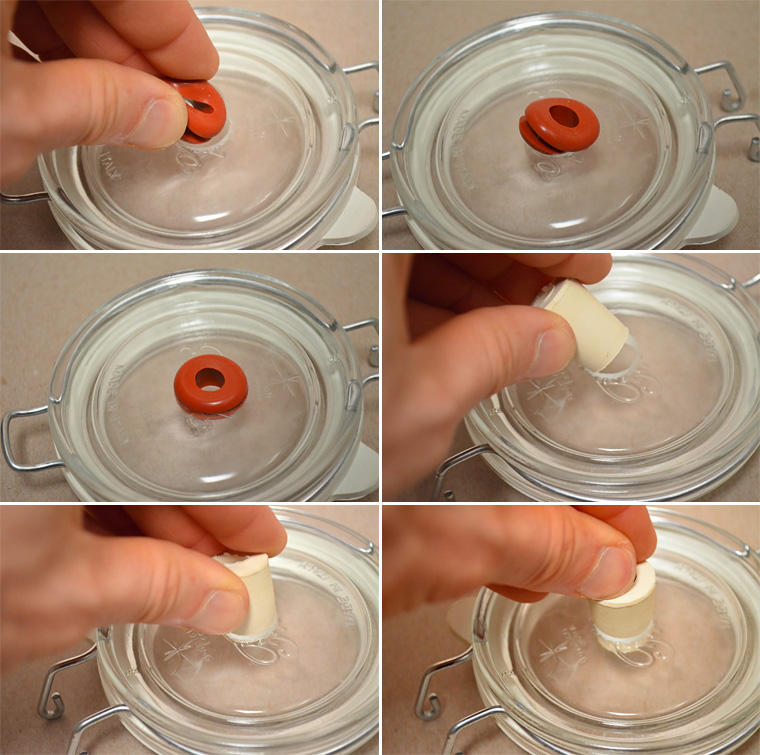
above: make it flush
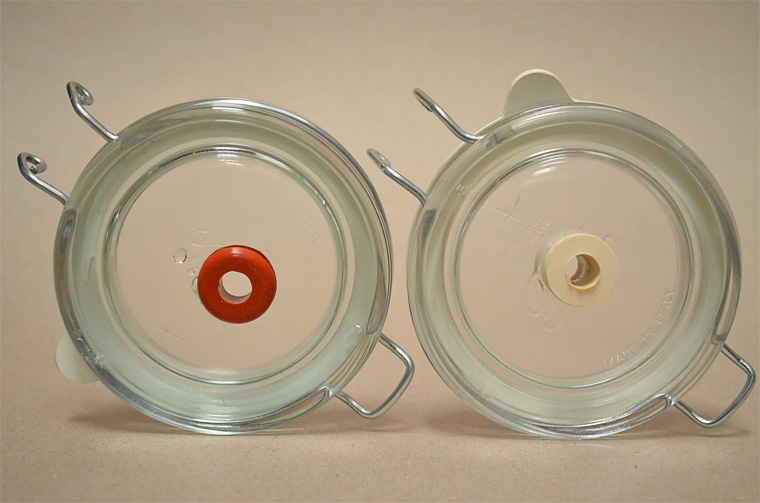
above: fully plugged lids
STEP 4: INSERT AIRLOCK
- The single piece airlocks fit a little better into the number 2 stopper, and the three piece airlocks fir a little better into the grommets. But the difference is negligible. Work with whatever supplies you can acquire.
- When using a grommet, push the airlock in until the stem sticks out of the bottom. When using a stopper, the airlock's stem will only fit about halfway into the hole before friction completely takes over.
- Insertion of either airlock is eased if you twist as you push.
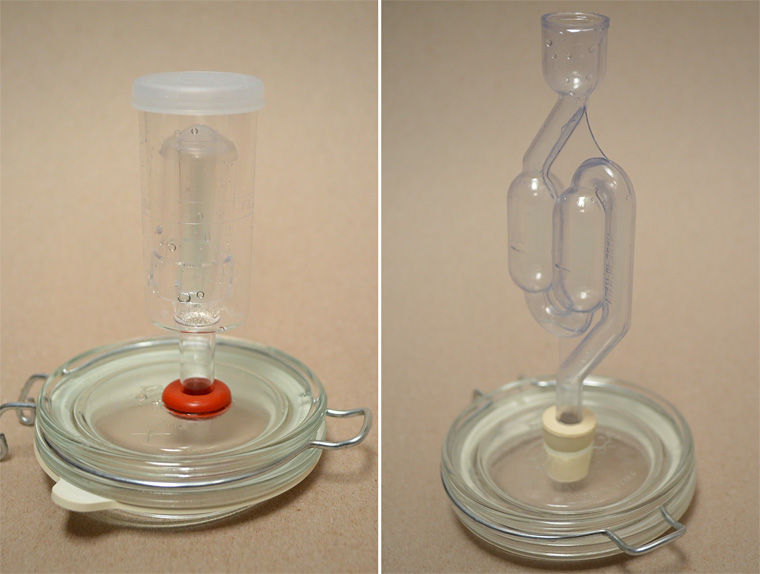
above: lids with airlocks fully installed
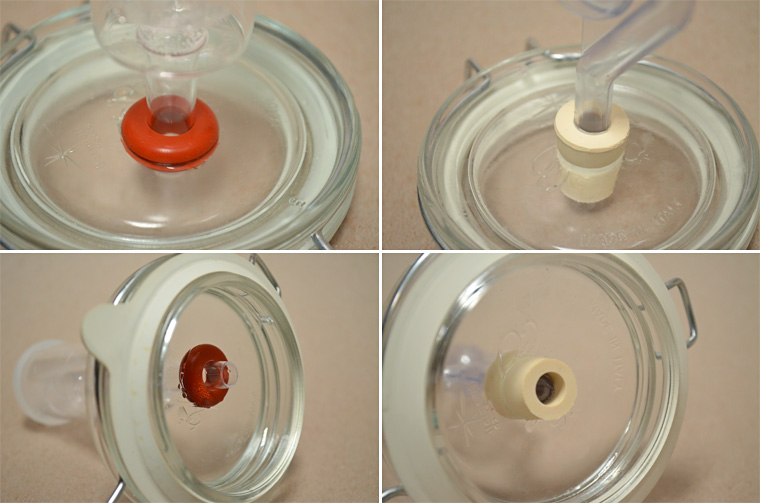
above: lid close ups (note difference in airlock stem projection)
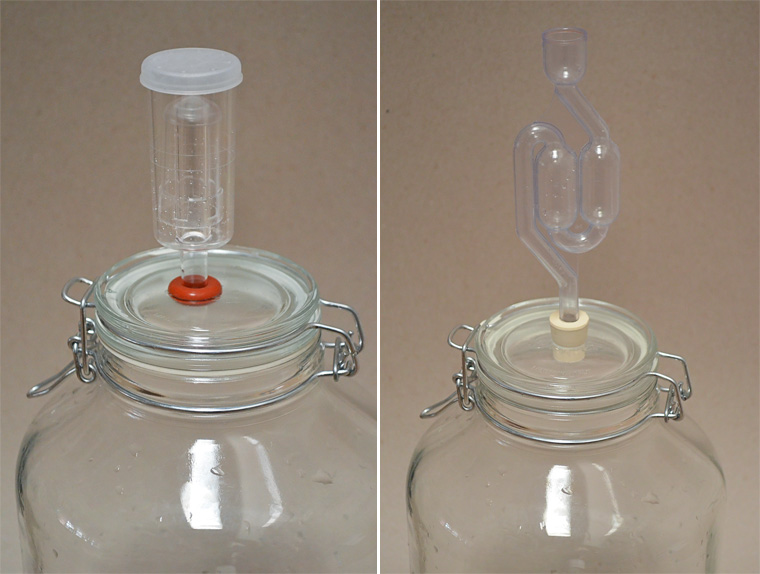
above: ready for red bell peppers OR WHATEVER OTHER MAGICAL FOOD YOU WANT TO FERMENT
STEP 5: SOMETHING TO HOLD THE FERMENTING FOOD UNDER THE BRINE
We're now getting into fermentation process/theory, a topic best left to the experts. But basically, you want something to hold the fermenting food underneath the brine. I've found two things that kind of work. One is a 3 oz. ramekin (also known as a 3.25″ ramekin) and other is the second smallest pyrex mixing bowl available at Sur La Table.
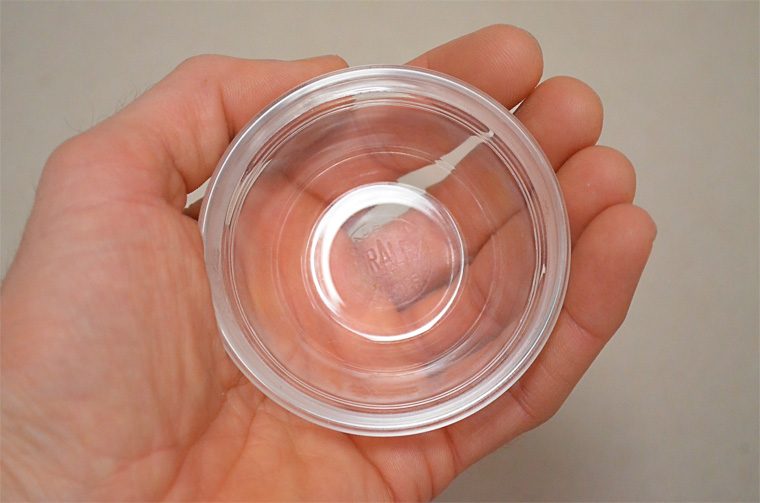
above: second smallest pyrex mixing bowl held in hand for size rerferece
STEP 6: GO WILD DIY FERMENTING EVERYTHING IN SIGHT
I'm quite partial to the fermented turkish-fig coconut granola on the Pickl-It site. It's delicious.